Overwatered Plants Fix: Save Container Plants 2026 Guide
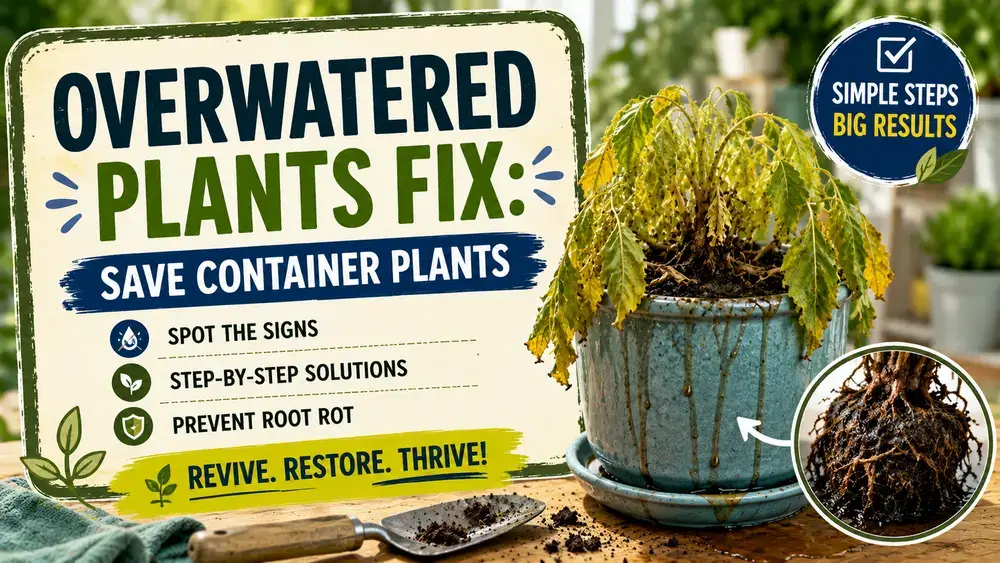
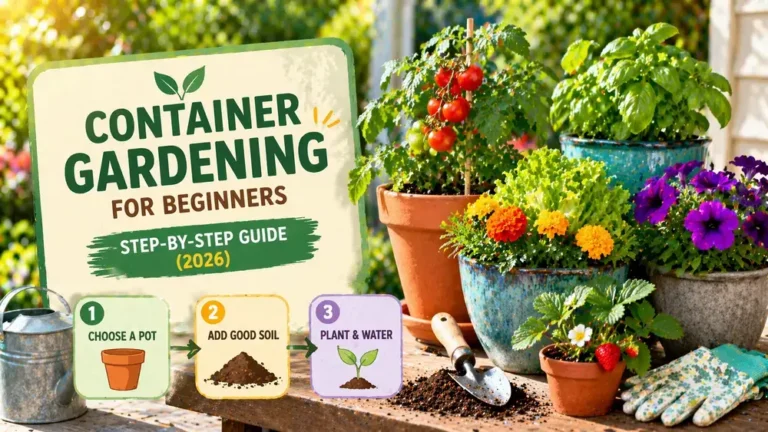
Container gardening is one of the easiest ways to grow flowers, herbs, vegetables, and houseplants. However, many gardeners accidentally kill healthy plants with kindness by giving them too much water.
If your plant has yellow leaves, drooping stems, or constantly wet soil, overwatering may be the problem. The good news is that an effective overwatered plants fix is often possible if you act quickly. Most container plants can recover when excess moisture is removed, and roots are given a chance to breathe again.
In this guide, you’ll learn how to identify overwatering symptoms, rescue struggling plants, prevent root damage, and keep your container garden healthy in the future.
Quick Answer
The best overwatered plants fix is to stop watering immediately, improve drainage, remove damaged roots if necessary, and allow the soil to dry to an appropriate moisture level. Acting early can prevent root rot and help your plant recover before permanent damage occurs.
How Overwatering Damages Container Plants
Unlike garden beds, containers hold a limited amount of soil. When excess water fills the spaces between soil particles, oxygen cannot reach the roots.
Healthy roots need both water and air. Without oxygen, roots begin to weaken and decay. This creates ideal conditions for fungal diseases and root rot.
According to the University of Maryland Extension, overwatered plants often show symptoms that look similar to underwatering because damaged roots can no longer absorb moisture properly.
Common Overwatering Symptoms Plants Show
Before applying any treatment, confirm that overwatering is the actual problem.
Early Signs
- Yellowing leaves
- Slow growth
- Soft stems
- Wilting despite wet soil
- Leaf drop
Advanced Signs
- Mushy roots
- Brown or black roots
- Mold on the soil surface
- Fungus gnats around containers
- A foul smell is coming from the pot
Quick Diagnosis Table
| Symptom | Likely Cause |
|---|---|
| Yellow leaves with wet soil | Overwatering |
| Wilting with dry soil | Underwatering |
| Mold on soil surface | Excess moisture |
| Root odor | Root rot |
| Fungus gnats | Constantly soggy soil |
Step 1: Stop Watering Immediately
The first step is simple but important.
Do not add more water, even if the plant appears wilted. Many gardeners mistakenly water again when leaves droop, making the problem worse.
Allow the soil to begin drying naturally.
Place the container in a location with:
- Good airflow
- Bright indirect sunlight
- Warm temperatures
Avoid intense afternoon sun if the plant is already stressed.
Step 2: Improve Drainage
Poor drainage is one of the most common causes of overwatering.
Check the bottom of the container.
Make sure:
- Drainage holes are not blocked
- Excess water can flow freely
- The pot is not sitting in standing water
If water remains trapped inside decorative cachepots or saucers, empty them immediately.
The Royal Horticultural Society explains that waterlogged soil deprives roots of oxygen and increases the risk of disease. Their guide on waterlogging and flooding provides additional information on how excess moisture affects plants.
Step 3: Remove Excess Moisture from the Soil
If the soil is extremely wet, help it dry faster.
Try these methods:
Increase Air Circulation
Move the container to a breezy area.
Loosen the Surface Soil
Gently break up compacted soil on the top layer using a hand fork.
Use Absorbent Materials
Place paper towels beneath drainage holes temporarily to absorb excess water.
Avoid Fertilizing
Fertilizer can stress already damaged roots.
Wait until the plant shows signs of recovery.
Step 4: Inspect the Root System
If the plant continues declining after several days, inspect the roots.
Carefully remove the plant from the container.
Healthy roots are:
- White
- Firm
- Crisp
Damaged roots are:
- Brown
- Black
- Mushy
- Slimy
Root inspection is often the most important step when saving overwatered plants.
Step 5: Perform a Plant Root Rot Fix
If root rot has started, immediate action is necessary.
Trim Damaged Roots
Using clean pruning scissors:
- Remove black roots
- Cut away mushy sections
- Keep as many healthy roots as possible
Disinfect Tools
Clean pruning tools before and after trimming to prevent disease spread.
Allow Roots to Dry
Let the root ball sit in a shaded area for one to two hours before repotting.
The Missouri Botanical Garden’s overwatering guide notes that prolonged saturation often leads to root deterioration and reduced plant vigor.
Step 6: Repot into Fresh Soil
Sometimes the existing soil remains too compacted or waterlogged.
Repotting gives the plant a fresh start.
Choose:
- A container with drainage holes
- Fresh, well-draining potting mix
- A pot size appropriate for the plant
Avoid reusing soil that contains root rot pathogens.
For better drainage and root health, choose a quality potting mix designed for containers. Our guide to the best soil for container gardening explains which soil types work best for potted plants.
Step 7: Resume Watering Correctly
After recovery begins, establish a better watering routine.
Many beginners water based on a schedule rather than actual soil moisture.
Instead:
Check Soil First
Insert your finger 1 to 2 inches into the soil.
If it feels dry, water.
If it feels moist, wait.
Water Thoroughly
When watering, saturate the soil completely until water drains from the bottom.
Avoid Frequent Light Watering
Small daily watering often keeps roots near the surface and encourages soggy conditions.
For a detailed watering schedule, read our guide on how often to water container plants.
Best Soggy Soil Solutions for Containers
Prevention is always easier than recovery.
Here are effective soggy soil solutions:
- Use lightweight potting mix
- Add perlite for drainage
- Avoid oversized containers
- Empty saucers after watering
- Raise pots slightly off the ground
- Use breathable terracotta pots
- Water based on soil moisture, not habit
These simple changes dramatically reduce overwatering risk.
Common Mistakes to Avoid
Watering on a Fixed Schedule
Weather conditions change daily. Plants need different amounts of water throughout the year.
Using Heavy Garden Soil
Garden soil compacts inside containers and retains too much moisture.
Ignoring Drainage Holes
Even the best potting mix cannot compensate for poor drainage.
Repotting into an Oversized Container
Large containers hold more water than roots can absorb.
Fertilizing Immediately After Stress
Wait until healthy growth resumes.
Plants Most Sensitive to Overwatering
Some container plants are especially vulnerable.
Highly Sensitive Plants
- Succulents
- Cacti
- Lavender
- Rosemary
- Snake plants
- ZZ plants
Moderately Sensitive Plants
- Tomatoes
- Peppers
- Basil
- Geraniums
More Tolerant Plants
- Mint
- Peace lilies
- Cannas
Even tolerant plants can suffer if soil remains saturated for extended periods.
When a Plant Cannot Be Saved
Unfortunately, not every plant recovers.
The chances of survival decrease when:
- Most roots are black and mushy
- The stem base has rotted
- Fungal growth has spread extensively
- The entire root system smells rotten
If recovery is unlikely, use the experience as a learning opportunity and improve future watering practices.
If you are unsure whether overwatering is the cause, our article on why container plants are dying can help identify other common problems.
Conclusion
An effective overwatered plants fix starts with recognizing the problem early. Yellow leaves, soggy soil, and wilting despite wet conditions are clear warning signs that roots may be struggling.
Stop watering immediately, improve drainage, inspect the roots, and repot if necessary. Most container plants recover surprisingly well when given the right care at the right time.
The key is prevention. By checking soil moisture before watering and using well-draining soil, you can avoid overwatering problems altogether and keep your container garden thriving.
Have you rescued an overwatered plant before? Share your experience in the comments below.
For more container gardening tips, explore our guides on watering container plants, choosing the best container soil, and diagnosing dying potted plants. You can also subscribe to our newsletter for practical gardening advice delivered straight to your inbox.
FAQs About Overwatered Plants Fix
1. How long does it take an overwatered container plant to recover?
Recovery time depends on how severely the plant was affected. Mild cases may improve within a few days, while plants with root damage can take several weeks to recover. The best overwatered plants fix is to stop watering, improve drainage, and monitor new growth. Healthy leaves appearing after a few weeks are usually a good sign.
2. Can yellow leaves turn green again after overwatering?
In most cases, yellow leaves will not turn green again. However, an effective overwatered plants fix can prevent further damage and encourage healthy new growth. Remove severely yellow or dead leaves so the plant can focus its energy on producing fresh foliage and repairing its root system.
3. Should I repot an overwatered plant immediately?
Not always. If the soil is wet but the roots are still healthy, allowing the soil to dry may be enough. However, if you notice root rot, foul odors, or compacted soil, repotting is often the best overwatered plants fix. Use fresh, well-draining potting mix and a container with drainage holes.
4. What is the fastest way to dry out soggy soil in a container?
Move the container to a warm, well-ventilated area and stop watering immediately. You can also loosen the top layer of soil to increase airflow. One of the quickest overwatered plants fix methods is improving drainage and ensuring excess water can freely escape through the bottom of the pot.
5. How can I prevent overwatering container plants in the future?
Always check the soil before watering instead of following a strict schedule. Insert your finger about 1 to 2 inches into the soil and water only when it feels dry. Using well-draining potting mix, choosing containers with drainage holes, and monitoring weather conditions are the most reliable ways to avoid future overwatering problems.